


Export From InDesign to HTML-2: How to Tag Paragraphs
In the previous article, we analyzed an example of how you can transfer local formatting to the html format by using a script, so as to avoid having to clean the resulting html code from unnecessary tags. In this article, we will improve the code: we will place paragraph html tags in the text, add a header and a footer, and, thus, obtain a full-fledged html document containing only the necessary style markup.
You should always remember that not even the most universal script will be able to get rid of problems, if there is a mess in the layout. Therefore, the first step is to make sure that only the necessary styles are used in the text, in the properties of which the corresponding tags are indicated. Of course, over time, in the process of debugging, you can "teach" the script to control various typesetter oversights, but for the initial stage of writing a program, full order in the layout must be achieved first.
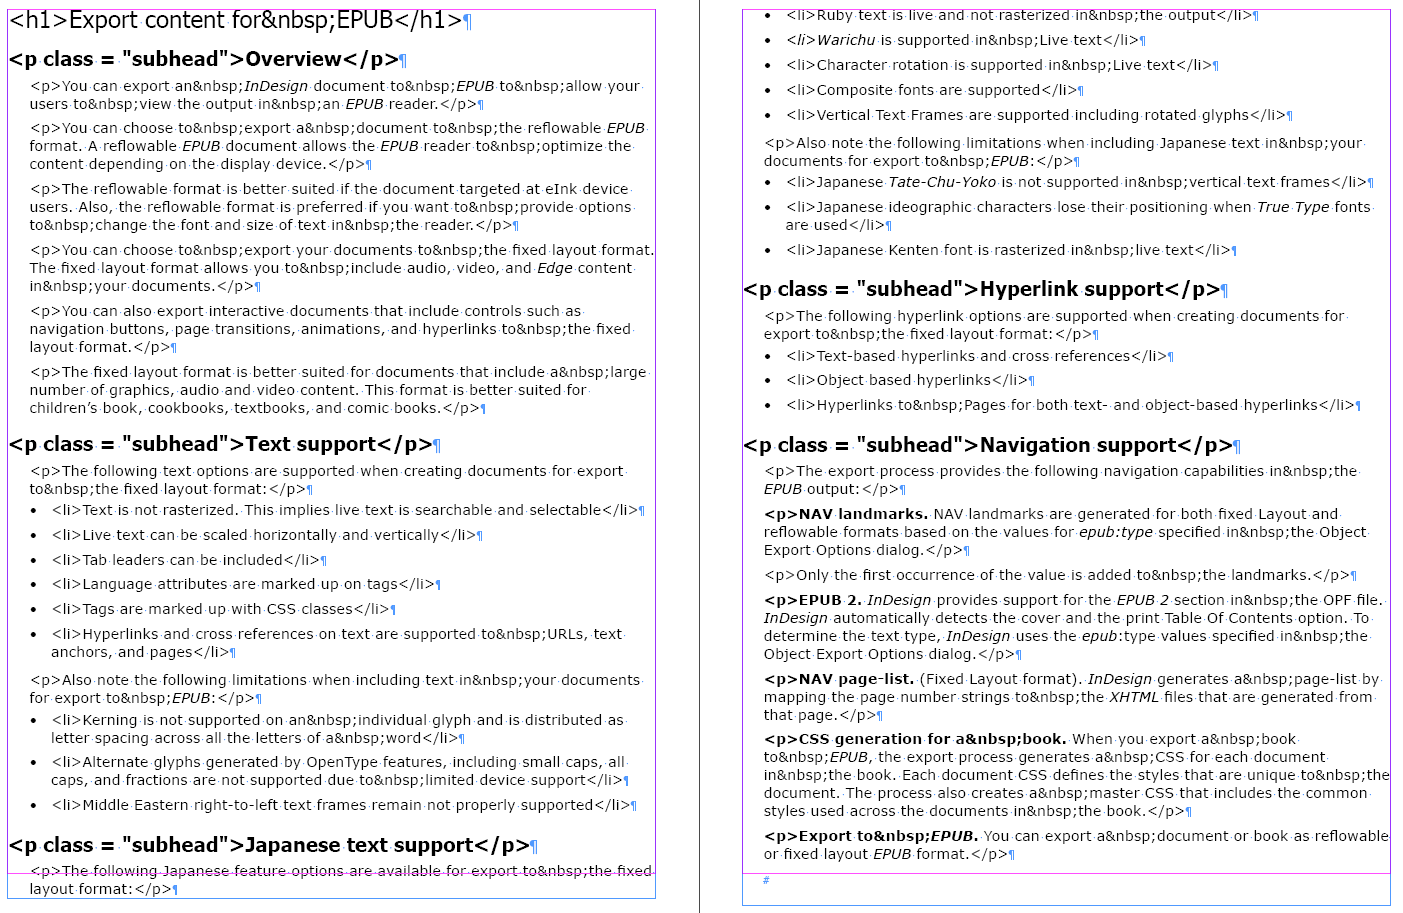
To work on the script, we will use a layout that contains the title of the article, subheadings, and lists (well, the main text too, of course). In addition, italic, bold, and bold italic local formats are used.
The paragraph style parameters required in this work look like this:
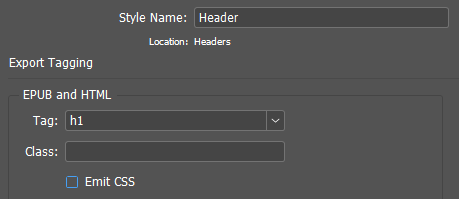
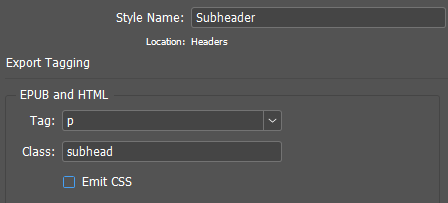
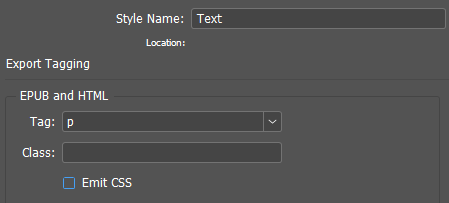
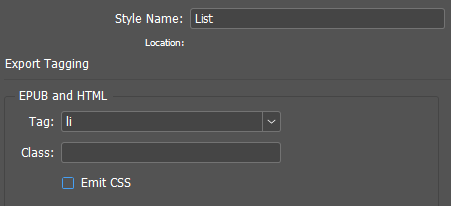
The required paragraph style properties in the object model:
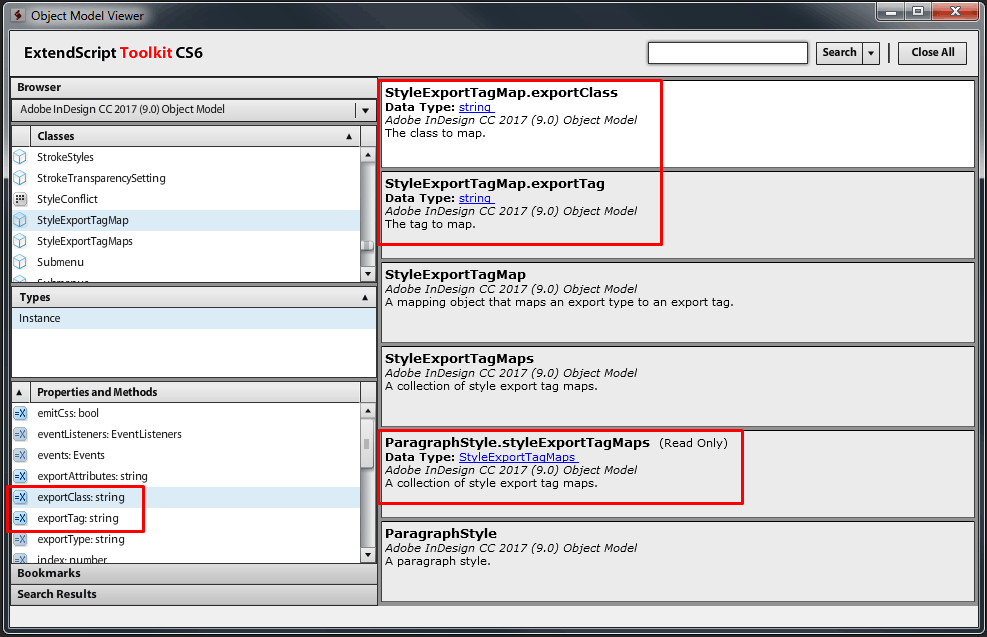
This time, we will work with paragraphs, so we will immediately address them in the current story (in which the cursor is set).
var doc = app.activeDocument;
var s = doc.selection[0].parentStory;
s.insertionPoints[-1].contents = "\r";
var p = s.paragraphs;
Notice the third line: it adds a paragraph end character to the last paragraph. If this is not done, this paragraph will not be processed by the script as it should.

The next step is to replace the nobreaking spaces with the corresponding special html characters:
app.findGrepPreferences = app.changeGrepPreferences = null;
app.findGrepPreferences.findWhat = "~S";
app.changeGrepPreferences.changeTo = " ";
s.changeGrep();
Now, we will start tagging. To do this, we will take each paragraph one by one, define its paragraph style, take the tag and class values from its options and assign the corresponding text to this paragraph at the beginning and at the end. We'll go through paragraphs starting from the end, since the content of the text is going to change.
for (i = p.length-1; i >= 0; i--){
	var curPS = p[i].appliedParagraphStyle; //Define paragraph style
	var ptag = "</"; //In the variable ptag form the closing tag.
	ptag += curPS.styleExportTagMaps[0].exportTag; //Tag name
	ptag += ">"; //Formed a string like "</p>"
	p[i].insertionPoints[-2].contents = ptag; //Add the resulting line to the end of the paragraph.


	var ec = curPS.styleExportTagMaps[0].exportClass; //Class CSS of current paragraph (paragraph style)
	p[i].insertionPoints[0].contents = ">"; // Add a closing bracket for the opening tag at the beginning of the paragraph.
	if (ec != ""){ //If style has class
		p[i].insertionPoints[0].contents = SpecialCharacters.DOUBLE_STRAIGHT_QUOTE; //Added a quote
		p[i].insertionPoints[0].contents = ec; //Added class
		p[i].insertionPoints[0].contents = SpecialCharacters.DOUBLE_STRAIGHT_QUOTE; //Added a quote
		p[i].insertionPoints[0].contents = " class = "; //Got a string like: class = "subhead">
	}
	p[i].insertionPoints[0].contents = "<" + curPS.styleExportTagMaps[0].exportTag; //Added a tag and an opening bracket
	//Got a string like <p class = "subhead">Paragraph content</p>"
	//or if class is absent:
	//<p>Paragraph content </p>"
	}
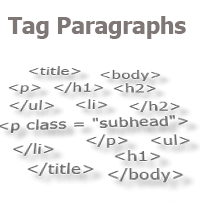
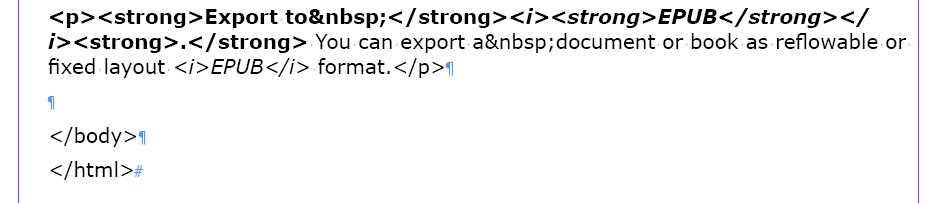
What is left to do is to collect all three code fragments one by one into one script, place the cursor in the text and start the script for execution. Do not forget to save the document in advance, so that, after execution, you can restore the original data from the "File/Revert" menu. If everything was done correctly, the text will take on the following form after the processing:
Now, we need to add the local format processing that was already implemented in the previous article and figure out how to proceed further with the lists: the paragraph tags of the <li> ... </li> list elements have been placed in text, but we must now add the <ul>...</ul> tags (in this case). But, let’s do this in order.
We’ll do what is easier first. We will add the necessary variables to the beginning of the code, and we will make the processing into a separate function (this solution will simplify the implementation of new tasks in the next article):
...
var sel = s.textStyleRanges;
var arr = [];
arr ["Bold"] = "strong";
arr ["Italic"] = "i";
arr ["Underline"] = "u";
arr ["Super"] = "sup";
arr ["Sub"] = "sub";
arr ["+"] = "";


gettags(sel);


for (i = p.length-1; i >= 0; i--){
...
	//or if class is absent:
	//<p>Paragraph content </p>"
	}

function gettags(sel){
	for (i = sel.length-1; i >= 0; i--){
		if (sel[i].appliedCharacterStyle.index != 0){
			var t = sel[i].appliedCharacterStyle.name.split(" ");
			for (j = 0; j < t.length; j++){
				if (t[j]!="+"){
					try{
						sel[i].contents = "<" + arr[t[j]] + ">" + sel[i].contents + "</" + arr[t[j]] + ">";
						}//try
					catch(e){}
					}//if
				}//for j
			}//if
		}//for i
	}//function
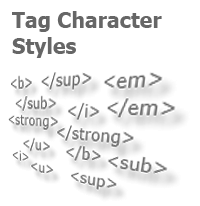
Let’s restore the publication to its original state (File/Revert) and run the script again. This time, we get the following result:
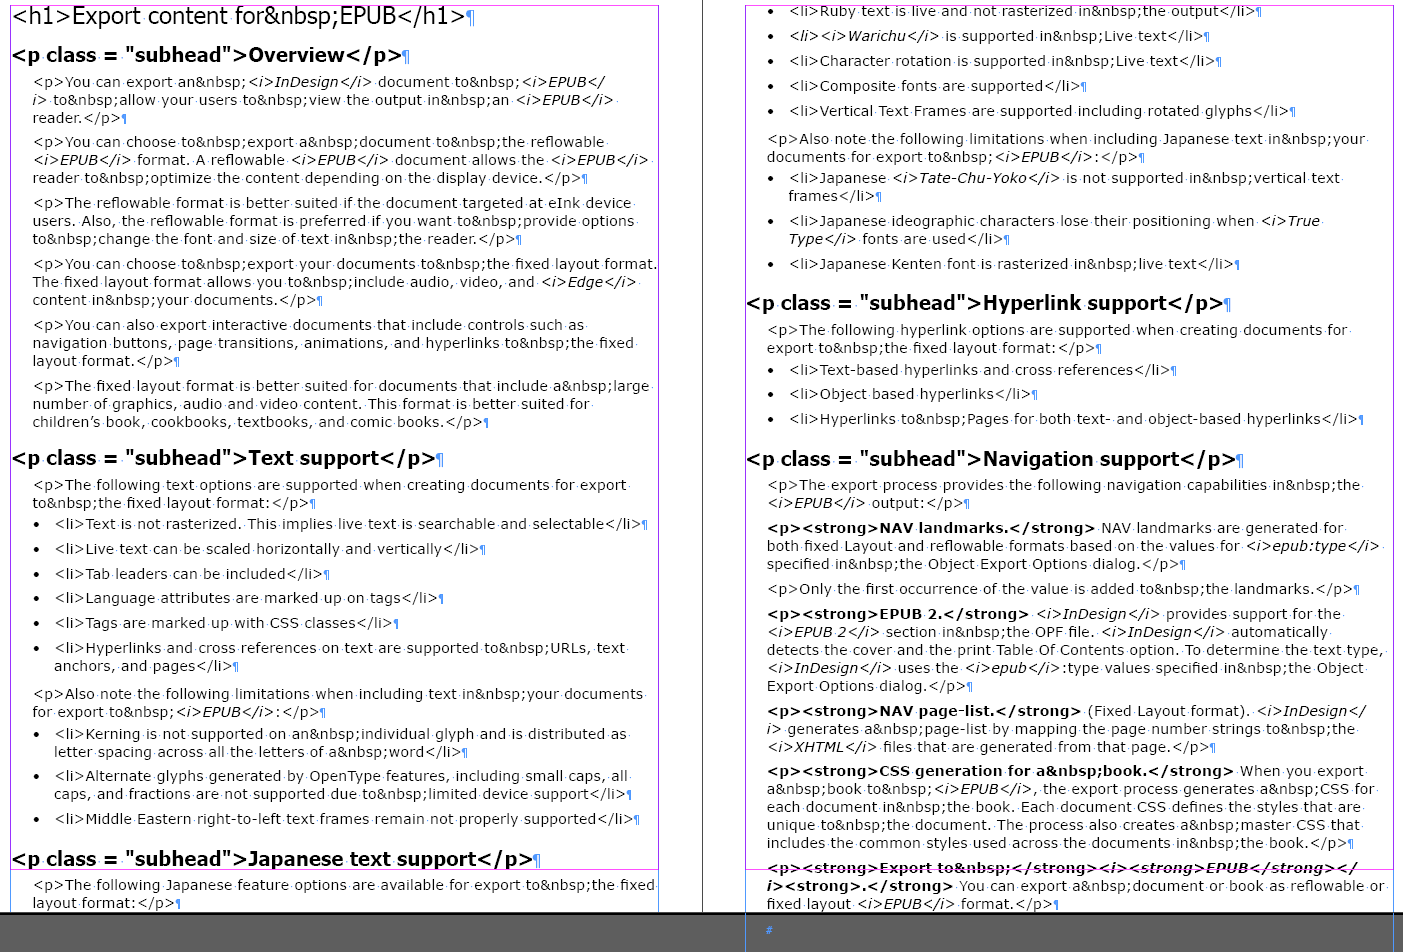
Notice that the <i></i> and <strong></strong> tags appeared in the places, where the corresponding character styles were applied.
Once again, let’s restore the original version of the file and now finally address the question with the lists. Here, without going into a long explanation, I’ll just give the needed code snippet.
	...
	gettags(sel);
	var is_li = false; //Definition of the beginning and end of the list

	for (i = p.length-1; i >= 0; i--){
		var curPS = p[i].appliedParagraphStyle; //We defined paragraph style
		var ptag = "</"; //In the variable ptag form the closing tag.
		ptag += curPS.styleExportTagMaps[0].exportTag; //Tag name
		ptag += ">"; //Formed a string like "</p>"

		//Recognize the last element of the list and add the closing tag </ul> to it
		if ((curPS.styleExportTagMaps[0].exportTag == "li")&&(!is_li)){
			ptag += "\r</ul>";
			is_li = true; //We are now “in the list”
			}
		//Finished adding a closing list tag

		p[i].insertionPoints[-2].contents = ptag; //Add the resulting line to the end of the paragraph.

		//If we are now in the list, and in the current paragraph the tag is no longer a list item,..
		//…then add after this paragraph the opening tag of the list <ul>
		if ((is_li)&&((curPS.styleExportTagMaps[0].exportTag != "li"))){
			p[i].insertionPoints[-1].contents = "<ul>\r";
			is_li = false; //We are no longer “in the list”
			}
		//Finished adding a list opening tag

		var ec = curPS.styleExportTagMaps[0].exportClass; //CSS class of the current paragraph (paragraph style)
	...
And, in conclusion (for today), we will add a header and a footer of the html document.
function insertHead(){
	var h = "<!DOCTYPE html PUBLIC \"\"-//W3C//DTD HTML 4.01 Transitional//EN\"\" \"\"http://www.w3.org/TR/html4/loose.dtd\"\">\r";
	h += "<html>\r";
	h += "<head>\r";
	h += "<meta content = \"\"text/html; charset = utf-8\"\" http-equiv=\"\"Content-Type\"\">\r";
	h += "<title>noname</title>\r";
	h += "<link href=\"\"css/style.css\"\" rel=\"\"stylesheet\"\" type=\"\"text/css\"\">\r";
	h += "</head>\r";
	h += "<body>\r";
	return h;
	}


function insertFoot(){
	var h = "\r</body>";
	h += "\r</html>";
	return h;
	}
These two functions must be placed at the end of the code. And in the middle, after all the operations are performed, we need to indicate the insertion points of the obtained data:
...
	p[i].insertionPoints[0].contents = "<" + curPS.styleExportTagMaps[0].exportTag; //Added a tag and an opening bracket
	//Got a string like <p class = "subhead">Paragraph content</p>"
	//or if class is absent:
	//<p>Paragraph content </p>"
	}

s.insertionPoints[-1].contents = insertFoot();
with (s.insertionPoints[0]){
	applyParagraphStyle(doc.paragraphStyles[0]);
	contents = insertHead();
	}
app.findGrepPreferences = app.changeGrepPreferences = null;
app.findGrepPreferences.findWhat = "\"\"";
var f = s.findGrep();
for (i = f.length-1; i >= 0; i--){
	f[i].contents = SpecialCharacters.DOUBLE_STRAIGHT_QUOTE;
	}
If you noticed, the paired quotation marks are placed in the header. After placing the header, the marks change with the help of the GREP into what we need, that is, the double straight quotation marks. This is done because the quotation marks from the string variable will be placed of such type, which is specified in the settings of the used dictionary, for example, «». But, in the html markup, only double straight quotation marks are required, and no other type. So, instead of figuring out the quotation marks’ settings each time, in this case, it is easier to task the script with this, especially since the process of replacing the quotation marks via a script will not reduce the script execution speed, and will be unnoticed by the user. For the same reason, in other code fragments, where quotation marks are required, they are arranged in separate lines of the code.
... The exporting of the completed text is performed the way it was described in the previous article, that is, not as html, but as plain text. In this case, in the box where the file name is indicated, you can easily specify the html extension and get the desired result.

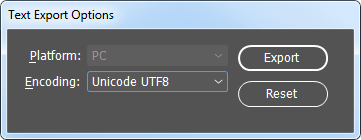
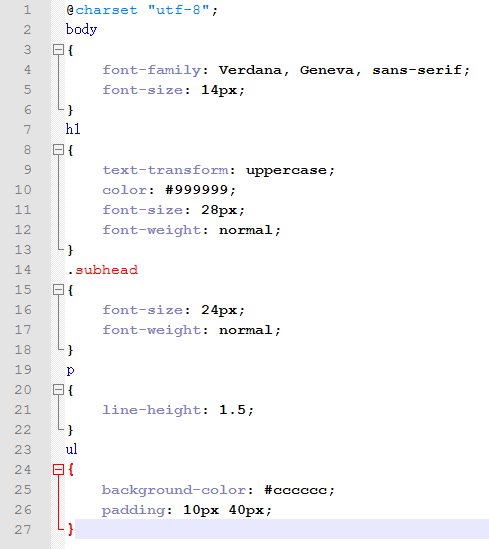
CSS is filled by itself, for example, like this:
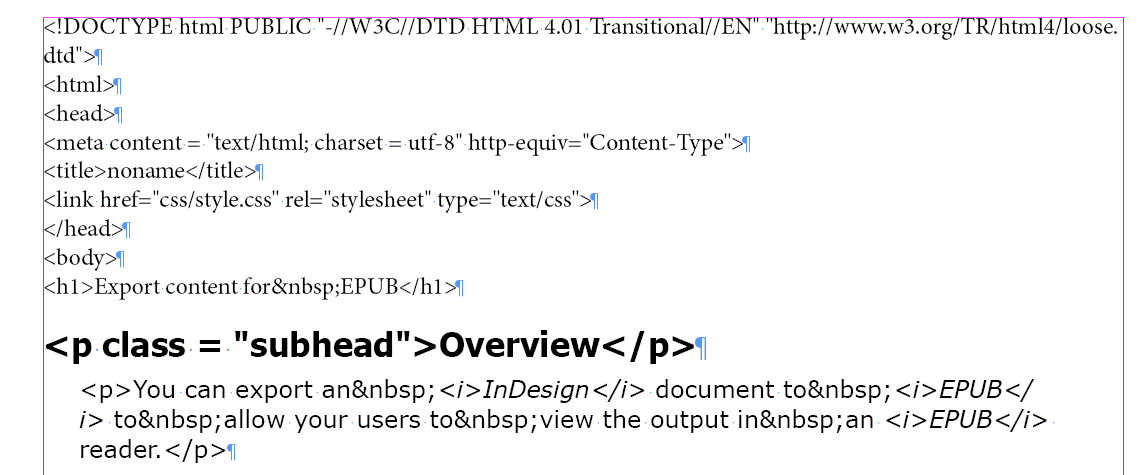
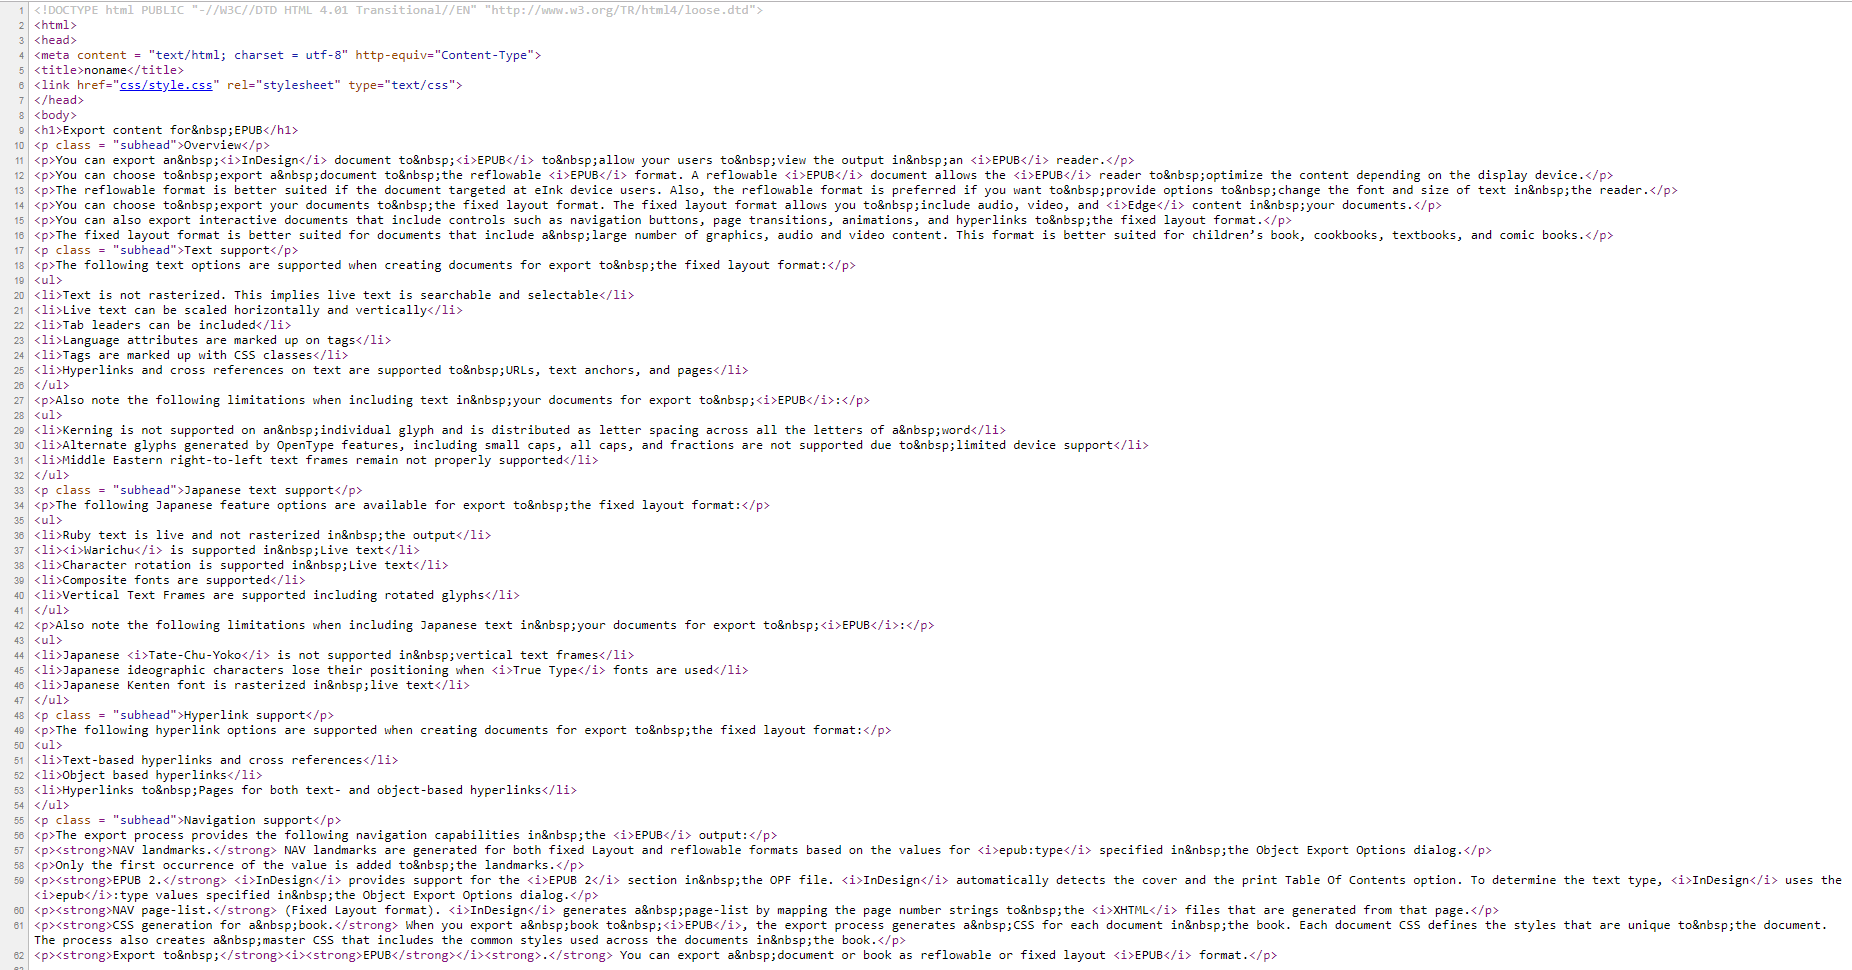
And the resulting html, formed with this algorithm and formatting, will look like this:
In the next article, we will deal with the tables, i.e. we will teach the script to convert the InDesign table into an html table with the html markup, which is necessary for the correct view. And in the fourth final article, we will place hyperlinks tags and image tags by the script.
No comments.
Other articles:
- Quick formatting
- Quick Spread Rotate
- Cross-Reference — in Two Clicks
- Access to the script from the localized menu
- Export From InDesign to HTML: How to Tag Character Styles
- Export From InDesign to HTML-3: Tables
- The Script Did Not Appear In the Menu, or One More Time About the Localization
- Export From InDesign to HTML-4: What to Do With Images and Hyperlinks
- Localized Menu: the Adventure Continues
- How to Access the List of Styles Through the User Interface

